Wide Body Kit Installation Guide: Complete Step-by-Step for Fiberglass Components
Installing a wide body kit on your vehicle requires specific tools, proper surface preparation, and methodical execution. This guide covers the installation process for fiberglass body components from initial unpacking through final paint preparation.
Required Tools and Materials
Before starting installation, gather these items:
Hand Tools:
- Socket set (8mm to 19mm)
- Torque wrench (10-150 Nm range)
- Angle grinder with 40-grit and 80-grit flap discs
- Rotary tool with carbide burrs
- Electric drill with step bits (3mm to 12mm)
- Panel cutters or aviation snips
- Metal files (flat and round, medium cut)
- Measuring tape (5m minimum)
- Digital caliper
- Clamps (minimum 6 pieces, 300mm capacity)
Consumables:
- 80-grit, 120-grit, 220-grit sandpaper
- Fiberglass resin and hardener (polyester or epoxy)
- Fiberglass mat (450g/m² weight)
- Body filler (2-part polyester)
- Self-tapping screws (M5 and M6, stainless steel)
- Rivnuts (M6 and M8)
- Panel adhesive (polyurethane or epoxy-based)
- Acetone or panel wipe solution
- Masking tape (50mm width)
- Zip ties (200mm length, UV-resistant)
Safety Equipment:
- Respirator with organic vapor cartridges (not a dust mask)
- Safety glasses
- Nitrile gloves
- Long-sleeve coveralls
Pre-Installation Component Inspection
Fiberglass components arrive in gel coat finish, which is the outer layer applied during molding. This surface is not structural. Check each piece for these specific issues:
- Gelcoat integrity — Look for surface cracks. Hairline cracks (under 0.5mm width) are normal stress marks from demolding and do not affect strength. Cracks wider than 1mm need repair before installation.
- Edges and flanges — The mounting edges should be at least 20mm wide. Narrow flanges (under 15mm) require reinforcement with additional fiberglass layers.
- Warpage — Place components on a flat surface. Gaps larger than 10mm indicate warping. Minor warpage (5-8mm) corrects during installation when clamped. Severe warpage needs heat correction.
- Mounting hole locations — Most components ship without pre-drilled holes. This allows fitment adjustment but requires careful marking during test fitting.
Quality components make a difference. Premium kits like the BMW E90 widebody kit feature proper flange thickness and reinforced mounting areas, reducing installation challenges.
Test Fitting Process
Test fitting determines where adjustments are needed. Do not skip this step.
Preparation:
- Clean all mounting surfaces on the vehicle with panel wipe
- Remove factory components that the body kit replaces
- Locate and mark factory mounting points with masking tape
- Take photos of the original configuration from multiple angles
Front Fender Test Fit:
Position the fender against the vehicle body. Two people are required — one holds the component while the other checks fitment.
- Check the door gap. The fender should maintain 4-6mm clearance when the door is closed. Gaps under 3mm will cause paint damage when the door opens. Gaps over 8mm look incorrect.
- Check the bumper overlap. The fender should overlap the front bumper by 8-12mm at the seam. This overlap gets covered by the seam line and allows adjustment during paint.
- Mark interference points. Use a pencil to mark any areas where the fender contacts the vehicle body. These areas need material removal.
- Mark mounting locations. While someone holds the fender in position, mark through existing factory holes with a marker. For new mounting points, mark locations that provide support every 150-200mm along the mounting flange.
Side Skirt Test Fit:
- Position the side skirt along the rocker panel. The top edge should sit flush against the pinch weld or rocker panel lip.
- Check the front and rear alignment. The side skirt should align with the front fender and rear quarter panel within 2mm. Misalignment requires trimming.
- Identify mounting method. Most side skirts attach with a combination of mechanical fasteners (at front and rear) and adhesive (along the length). Mark fastener locations at 250mm intervals.
Rear Widebody/Over Fender Test Fit:
- Position the rear section over the factory quarter panel. Wide body pieces that go over the factory panel need precise alignment with the body lines.
- Check the alignment with the rear door or front fender depending on whether you're installing on a coupe, sedan, or wagon. The body lines should flow continuously within 1mm.
- Check the wheel clearance. With the wheel at full suspension droop (vehicle on stands), there should be minimum 25mm clearance between the tire and the widebody at all points. With the wheel at full compression (someone bouncing the corner), maintain minimum 15mm clearance.
- Mark the attachment method. Rear widebody sections typically attach in three ways:
- Rivnuts installed into the factory quarter panel (primary structural attachment)
- Self-tapping screws into the wheel well lip (secondary attachment)
- Panel adhesive along the mating surfaces (sealing and supplemental bonding)
Material Preparation and Trimming
Fiberglass components require trimming and surface preparation before installation.
Flange Trimming:
- Mark trim lines. Use masking tape to mark where material needs removal. Common areas include wheel well clearance and mounting flange excess.
- Cut with an angle grinder. Use a 40-grit flap disc at 8000-10000 RPM. Cut on the waste side of your line, leaving 2-3mm for final fitting.
- Finish edges. After rough cutting, use a rotary tool with a carbide burr to smooth the edge. Follow with 80-grit sandpaper on a block to create a smooth edge. The edge should have a slight bevel (15-20 degrees) toward the back side.
Mounting Flange Reinforcement:
If flanges are thin (under 2mm) or narrow (under 20mm), add reinforcement:
- Cut fiberglass mat into strips 50mm wide.
- Mix resin according to manufacturer specifications. For polyester resin, use 1-2% hardener by volume. Temperature affects cure time — at 20°C expect 15-20 minute working time.
- Apply resin to the back side of the flange with a brush.
- Lay the fiberglass mat strip along the flange, extending 25mm past the edge onto the main panel.
- Saturate the mat with additional resin using a stippling motion with the brush.
- Allow to cure for 24 hours at 20°C before drilling mounting holes.
Surface Preparation:
- Sand the entire gel coat surface with 120-grit sandpaper. This removes the gloss and creates a mechanical key for filler and primer. The surface should have a uniform matte appearance.
- Clean with acetone. Use a clean cloth dampened with acetone to remove sanding dust and any release agent residue from manufacturing.
- Inspect for pinholes. Pinholes are small voids in the gel coat surface where air was trapped during molding. Circle any pinholes larger than 1mm with a marker.
- Fill pinholes. Mix body filler and apply with a squeegee, forcing material into the holes. Scrape flat and allow to cure for 30 minutes. Sand flush with 120-grit paper.
Mounting Hardware Installation
Proper fastener installation prevents stress cracks and allows removal if needed.
Rivnut Installation:
- Drill pilot holes. Use a step bit to drill 8.5mm holes for M6 rivnuts or 11mm holes for M8 rivnuts. Deburr both sides of each hole with a countersink bit.
- Insert the rivnut. Thread the rivnut onto the installation tool mandrel.
- Install the rivnut. Insert the rivnut into the hole and squeeze the tool handles until the rivnut collapses and grips the panel. The flange should be tight against the panel surface.
- Remove the tool. Unthread the mandrel from the rivnut by turning counterclockwise.
- Test each rivnut. Thread a bolt into each rivnut and apply moderate torque (8-10 Nm). If the rivnut spins, it was not installed correctly and must be drilled out and replaced.
Drilling Component Mounting Holes:
- Transfer marks from test fitting. Use the marks made during test fitting to locate hole positions.
- Drill pilot holes. Start with a 3mm bit to create a pilot hole. Check alignment before enlarging.
- Enlarge to final size. For M6 hardware use 6.5mm holes. For M8 hardware use 8.5mm holes. Larger holes allow adjustment during final fitting.
- Deburr and clean. Remove fiberglass fuzz from around each hole with a countersink bit or knife. Blow out fiberglass dust with compressed air.
Installation Sequence
Install components in this order to maintain proper alignment:
Step 1: Front Fenders
- Apply panel adhesive to the mounting flange in a continuous bead 5mm wide.
- Position the fender and install the top mounting bolts finger-tight. Start with the bolts closest to the A-pillar.
- Install the remaining bolts working from front to back. Tighten to 8-10 Nm with a torque wrench.
- Check door operation. Open and close the door 10 times, checking for contact. Adjust fender position if needed before the adhesive cures.
- Clamp the fender to the factory panel along the adhesive joint. Use clamps every 200mm. Leave clamps in place for the adhesive cure time specified by the manufacturer (typically 24 hours).
Step 2: Rear Widebody Sections
- Clean the mating surface on the factory quarter panel with acetone.
- Install rivnuts into the factory panel at the marked locations. Typical installation uses 6-8 rivnuts per side spaced 150-200mm apart.
- Apply panel adhesive to the inner surface of the widebody section. Apply a bead 8-10mm wide around the perimeter and create a crosshatch pattern in the center area.
- Position the widebody section and install bolts through the rivnuts. Start bolts but leave them loose.
- Adjust the position for body line alignment. Use a straight edge to check that body lines flow continuously from the door or front fender.
- Tighten bolts progressively. Use a star pattern and torque to 10-12 Nm.
- Install self-tapping screws into the wheel well lip. These screws primarily prevent the bottom edge from flexing. Space them 100-150mm apart.
- Apply weight or clamps to the adhesive joint. The adhesive needs pressure during cure. Use padded clamps or place weight (sandbags work well) on the panel. Maintain pressure for 24 hours.
Step 3: Side Skirts
- Mark the attachment line on the rocker panel. The side skirt should sit against the pinch weld or factory rocker panel edge.
- Install mounting brackets at the front and rear. These brackets typically bolt to existing holes in the bumper mounting area. Some kits require fabricating brackets.
- Apply panel adhesive to the top edge of the side skirt. Use a continuous bead 10mm wide.
- Position the side skirt and attach to the front and rear brackets with bolts. Tighten to 8-10 Nm.
- Press the adhesive joint firmly. Work along the entire length, pressing the side skirt against the rocker panel. The adhesive should squeeze out slightly, indicating good contact.
- Install supplemental fasteners if needed. Some installations benefit from rivnuts installed through the rocker panel at 300mm intervals with bolts threading into the back of the side skirt.
- Tape the joint. Apply masking tape along the top edge where the side skirt meets the body. This holds the joint during adhesive cure and indicates where additional body filler may be needed.
Step 4: Front Lip (if included)
- Test fit the lip to the bumper. Mark any interference points that need trimming.
- Trim the lip mounting flanges if needed. The lip should follow the bumper contour within 3mm.
- Drill mounting holes. Most lips install with self-tapping screws spaced 150mm apart through the bottom edge of the bumper.
- Apply a bead of flexible adhesive along the mounting flange. Use polyurethane adhesive rated for automotive applications.
- Install the lip and secure with self-tapping screws. Start from the center and work outward to prevent buckling.
- For additional security, install zip ties through holes drilled in both the lip and bumper. Space zip ties between screws.
Step 5: Ducktail/Boot Lid Spoiler (if included)
- Position the ducktail on the boot lid. Most ducktails sit on the factory surface rather than replacing it.
- Mark mounting locations. Ducktails typically use 4-6 mounting points. Mark through the mounting holes onto the boot lid.
- Drill mounting holes through the boot lid. Size depends on the fastener type. M6 bolts need 6.5mm holes.
- Install backing plates inside the boot lid. These distribute load and prevent stress cracks. Cut aluminum or steel plates 50mm x 50mm with a center hole.
- Apply adhesive to the ducktail base. Use flexible polyurethane adhesive.
- Position the ducktail and install bolts from underneath, threading through the backing plates. Torque to 8-10 Nm.
Gap Adjustment and Alignment
After initial installation, check and adjust gaps:
- Door gaps — All gaps around doors should be 4-6mm when measured with a gap gauge. Gaps that vary more than 2mm along their length need adjustment.
- Panel alignment — Use a straight edge to check that adjacent panels align within 1mm vertically. Horizontal alignment (fore-aft) should be within 2mm.
- Seam location — Seams between components should be consistent width. Mark uneven seams with tape and note which component needs adjustment.
Adjustment methods:
- Loosen fasteners and reposition the component
- Add shims (washers or cut plastic) behind mounting points
- Elongate mounting holes with a file to increase adjustment range
- Heat form minor warpage with a heat gun (120-150°C) while supporting the panel
Final Surface Preparation for Paint
Components are now installed but require additional work before paint:
- Fill seams — Apply body filler along all seams between components and factory panels. Overfill by 2mm to allow for sanding. Allow 30 minute cure.
- Sand seams — Sand filled seams with 80-grit paper until flush. Feather edges 50mm on each side. Follow with 120-grit to smooth.
- Apply high-build filler — Spray or spread high-build primer-filler over the entire component. This fills surface imperfections and creates a uniform surface. Apply 2-3 coats with 30 minutes between coats.
- Block sand — After the filler cures (4-6 hours), block sand with 220-grit paper on a sanding block. The block ensures a flat surface. Sand until the surface is uniform grey with no shiny spots (shiny spots are low areas).
- Apply guide coat — Spray a light mist of contrasting color (usually black) over the sanded surface. This helps identify low spots during final sanding.
- Final sand — Block sand again with 320-grit paper. Sand until the guide coat is gone from high spots but remains in low spots. Low spots need additional filler.
- Repeat — Alternate between filler application and sanding until the entire surface is flat and smooth when viewed in a light.
The components are now ready for primer and paint application.
Common Installation Mistakes
- Incorrect Fastener Torque — Over-tightening hardware cracks fiberglass. Torque specifications exist because fiberglass has low compressive strength. Tightening beyond 12 Nm on typical M6 fasteners can cause immediate cracking or delayed failure. Under-tightening allows movement that causes stress cracks over time. Use a torque wrench.
- Insufficient Adhesive Cure Time — Panel adhesive requires full cure before stress. Driving before adhesive cures breaks the bond. Most automotive adhesives need 24-48 hours at 20°C. Temperature below 15°C significantly extends cure time. Cold weather installations may need 72 hours.
- Skipping Test Fitting — Installing components without test fitting causes alignment problems that are difficult to correct after adhesive application. The 2-3 hours spent on careful test fitting prevents days of correction work.
- Using Regular Bolts in Rivnuts — Standard bolts in rivnuts can pull out under stress. Always use bolts that are 5mm longer than the rivnut depth to ensure full thread engagement. Apply threadlocker (medium strength, blue) to prevent loosening from vibration.
- Drilling Mounting Holes Too Small — Holes drilled at exact bolt diameter don't allow adjustment. Holes should be 0.5mm larger than bolt diameter for M6 and smaller hardware, 1mm larger for M8 and M10. This clearance is necessary for alignment.
- Not Reinforcing Thin Sections — Thin fiberglass (under 2mm) in stress areas cracks. Mounting flanges, door gaps, and edges near fasteners need reinforcement. Add 1-2 layers of fiberglass mat to the back side before installation.
- Improper Wheel Clearance — Static clearance (vehicle on stands) appears sufficient but dynamic clearance (wheel moving through suspension travel) causes tire contact. Always check clearance at full compression. If you hear rubbing, damage has already occurred.
- Mixing Incompatible Adhesives — Polyurethane and epoxy adhesives don't bond to each other. Choose one adhesive type and use it throughout. Mixing types causes failure at the interface.
Storage and Handling
If you're not installing immediately:
- Store components indoors at 15-25°C
- Keep away from direct sunlight (UV degrades fiberglass resin)
- Stack flat with cardboard between components
- Don't store anything on top (causes warpage)
- Humidity over 70% can affect resin cure of uncured components
Fiberglass has 1-2 year shelf life if stored properly. Gel coat may yellow after 6 months of sunlight exposure.
Frequently Asked Questions
Q: How long does body kit installation take?
A: Experienced installers need 16-24 hours of work time spread over 4-5 days when including adhesive cure time. First-time installations typically take 30-40 hours. This does not include paint preparation, which adds another 20-30 hours depending on desired finish quality.
Q: Can I install a body kit without professional help?
A: Installation is possible with automotive experience and proper tools. You need skills in working with fiberglass, metal fabrication, and basic body work. Without these skills, professional installation is recommended to avoid damage to components or vehicle.
Q: What thickness fiberglass is used in body kits?
A: Most body kits use 1-2mm fiberglass layup with gel coat. This thickness provides adequate strength for automotive applications while keeping weight reasonable. Structural areas like mounting flanges should be 2-3mm. Racing applications sometimes use 3-4mm in high stress areas.
Q: Why do body kits need adjustment during installation?
A: Fiberglass is hand-laid during manufacturing, which creates variation between pieces. Vehicle manufacturing tolerances also vary. No two installations are identical. This is why components ship without pre-drilled mounting holes and require test fitting.
Q: What's the difference between gel coat and paint?
A: Gel coat is the outer resin layer applied in the mold before the fiberglass layup. It provides a smooth surface but is not a finish coating. Gel coat is typically 0.3-0.5mm thick. Paint is applied after installation and provides UV protection and color. You cannot drive a vehicle with gel coat only — it must be painted.
Q: Do body kits require vehicle modification?
A: Most wide body kits require no permanent vehicle modification. Rivnuts are installed into existing sheet metal but can be removed. Some installations require drilling the boot lid for spoiler mounting. Front fenders typically replace factory fenders. Check specific kit requirements before purchase.
Q: How much wider does a +50mm body kit make the vehicle?
A: The +50mm designation means each side widens by 50mm, for a total width increase of 100mm (50mm per side). This affects track width and requires consideration for garage clearance and legal restrictions in some regions. Kits like the BMW E91 +50mm widebody add significant presence while maintaining drivability.
Q: What happens if I don't use adhesive, just bolts?
A: Bolts alone don't seal the joint between components and body panels. Water infiltration causes rust. Bolts also concentrate stress at fastener locations, increasing crack risk. The combination of mechanical fasteners and adhesive distributes load and seals against moisture.
Q: Can I install a body kit on a car with rust?
A: Rust must be repaired before body kit installation. The body kit attaches to the vehicle structure. Rust weakens this structure and prevents proper adhesive bonding. Repair rust, treat with rust converter or encapsulator, and then install the body kit.
Q: How do I maintain fiberglass body components?
A: Wash with car wash soap and water. Don't use pressure washers directly on seams (keeps water out of joints). Wax every 3 months to protect paint. Inspect fasteners annually and re-torque if needed. Inspect adhesive joints for separation and re-seal if necessary.
Q: What causes body kit components to crack?
A: Common causes include improper installation (over-tightened fasteners, insufficient adhesive, thin mounting flanges), impact damage (curbs, road debris), vehicle flex (needs isolation from chassis flex points), and fatigue from vibration. Proper installation with adequate fasteners and adhesive prevents most cracking.
Q: Can I remove a body kit after installation?
A: Yes, but adhesive removal requires cutting with a wire wheel and panel adhesive remover. Rivnuts remain in the vehicle but can be removed and the holes patched. Paint on factory panels underneath will need correction. Plan for 8-12 hours of removal work.
Q: What's the weight of a complete fiberglass body kit?
A: A complete wide body kit (front fenders, rear sections, side skirts, lip, spoiler) weighs 15-25 kg depending on size and thickness. This is significantly lighter than OEM body panels or metal wide body conversions.
Q: Do I need to inform insurance about body kit installation?
A: Most insurance policies require notification of modifications. Failure to disclose can void coverage. Contact your insurance provider before installation. Some providers charge additional premium for modified vehicles.
Q: How does a body kit affect vehicle handling?
A: Properly installed body kits have minimal effect on handling since they're aerodynamic surfaces. Added width requires adjustment to driving, particularly in parking and narrow spaces. Some designs improve aerodynamics at speed. Weight impact is negligible compared to vehicle weight.
Q: What should I do if components arrive damaged?
A: Document damage immediately with photos from multiple angles. Contact the supplier within 24-48 hours. Don't attempt installation or repair before contacting the supplier. Most shipping damage is repairable with fiberglass repair techniques, but this should be determined with the supplier first.
Q: Can body kits be repaired if damaged?
A: Fiberglass repairs are straightforward for installers familiar with fiberglass work. Minor cracks require resin injection. Larger damage requires cutting out the damaged section, laying new fiberglass mat, and refinishing. Repair techniques are similar to boat repair.
Q: What temperature is needed for installation?
A: Install at 15-25°C for proper adhesive cure and resin work. Below 10°C, adhesives don't cure properly and fiberglass resin has extended cure times. Above 30°C, working time decreases significantly. Cold weather installations require heated workspace.
Q: Do body kits affect fuel consumption?
A: Minimal effect in normal driving. At highway speeds above 100 km/h, aerodynamic changes can affect consumption by 2-5% depending on design. Properly designed kits may improve fuel economy by reducing drag. Poor designs increase drag and consumption.
Q: What paint type is recommended?
A: Two-part urethane automotive paint provides best durability. Single-stage or base coat with clear coat both work. The paint system must include flex additive (typically 10-15% by volume) to accommodate the flex in fiberglass components. Without flex additive, paint will crack.
Q: Can I install a body kit on a leased vehicle?
A: Check your lease agreement. Most leases prohibit modifications that can't be reversed without damage. Body kit installation is typically reversible but requires time and expense. Consult the leasing company before proceeding.
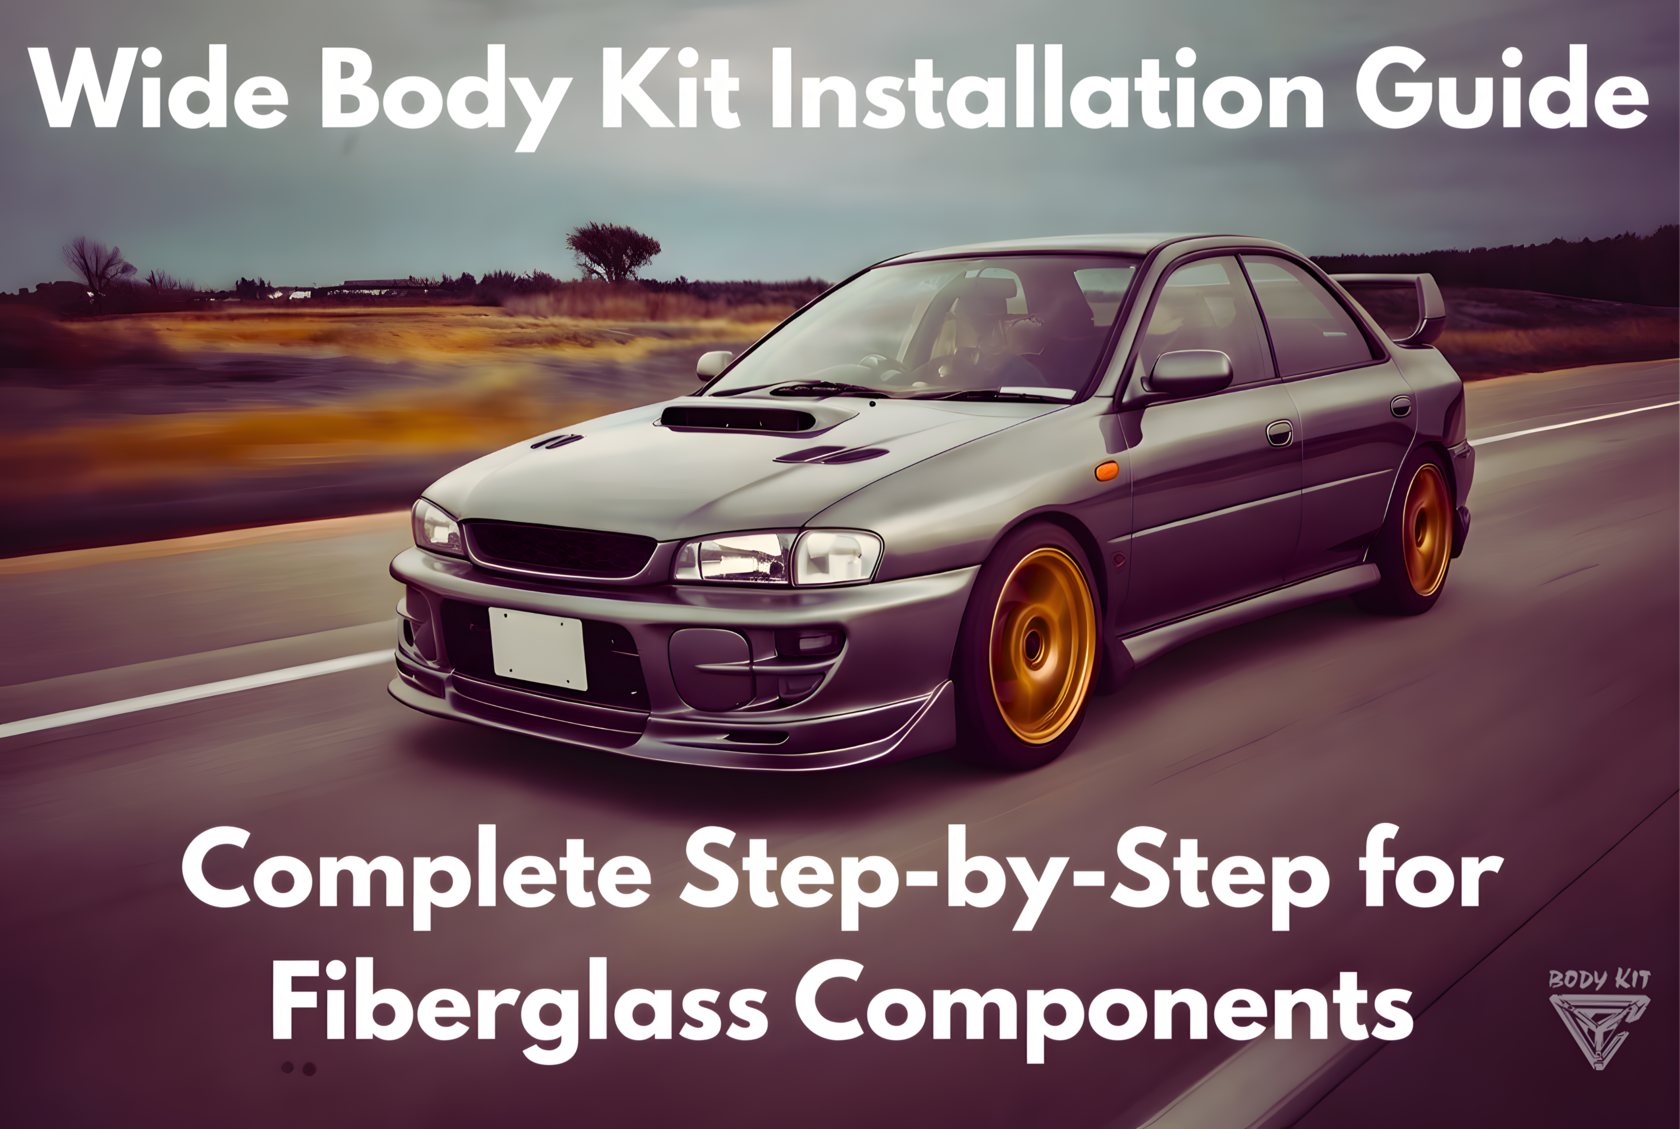
Q: Where can I find quality widebody kits for classic JDM cars?
A: Look for manufacturers with extensive fiberglass experience and vehicle-specific expertise. For classic builds, the Subaru Impreza GC/GF widebody kit offers period-correct styling with modern manufacturing quality, perfect for maintaining the iconic 90s JDM aesthetic.
Ready to Install?
Shop our premium fiberglass widebody kits, front lips, and aero parts at Body Kit Online Store — hand-crafted components backed by two decades of fiberglass experience.